
Making a (Kick-Ass) Paint Booth for Around $200
- Cassie

- Nov 3, 2020
- 7 min read
Updated: Nov 4, 2020

I've been restoring and repainting bits and pieces of arcade games for a very long time now. Repainting something small like say, a coin door is no big deal... painting a full sized cabinet without the aid of a controlled paint booth area can be difficult however. In the past when I have needed to paint a cabinet I used a dry roller technique, usually with good to great results. But with a number of current projects in my workshop needing full coverage repaints I thought it was time (and long overdue) to invest in a spray gun for painting, which meant it was also time for a paint booth. My Donkey Kong red cabinet was a perfect candidate for my spray gun/paint booth repaint. It was heavily damaged with gouges and scratches requiring Bondo and heavy sanding. I also wanted to as closely as possible match the original painted red laminate's smoothness and luster. With my perfectly matched oil based paint ready to go, it was time to revive my barn find Donkey Kong back to it's former ranging red glory.

Painting with a spray gun has some distinct advantages, mostly with consistency in the application of the paint. Paint guns also have disadvantages, they can be finicky to use, a pain in the butt to clean up, expensive sometimes, and can be fussy in the types of paint you use. The biggest challenge with using a spray gun is they, well kind of spray the paint freaking everywhere so any area you paint in will have particulate of paint getting places you may not want. Compared to a can of spray paint which is limited in the force and breath in which the paint is propelled, spray guns are powerful and can push much more paint through the nozzle in a sort time period.
Spray gun painters have come a long way in the last ten years or so. Newer models don't require additional air compressors and are actually pretty good for light to medium duty work like say, painting a small piece of furniture or an arcade cabinet. I did a bit of research before buying one and ended up on this air compressor-less Wagner model which was both well rated, and had the ability to use oil based paints without thinning them (more on that in a bit). The lack of an air compressor was a positive for me since I wasn't going to paint a large area (like say the side of a house), and I wanted to have a free reign of movement while painting. There are two nozzle settings and 10 power settings with the paint gun, and overall it was pretty well made for the price I paid.

I have seen a number of DYI paint booths on-line in various blog posts from both fellow arcade game collectors and people who are into other crafts. Often they involve either constructing a permanent shelter of some kind, sometimes using PVC piping and plastic to make a booth, or buying a pre-made half tent style device that is mostly always open to the elements. A permanent shelter would be too expensive, waste too much space, and was just overkill for my needs. The PVC piping constructed paint booths are interesting, but too hard to break down and reuse later without a ton of hassle. I also felt the PVC booths looked flimsy and the materials needed to make one could get to be around 300 dollars. Those little half tent open sided spray booths are really meant for small items and wouldn't work for an almost 6 foot tall arcade game. Plus I really wanted to be able to paint the game with no possible intrusion of flying do-dads in the air messing with my sweet paint job.
My big idea was to buy a cheap pop up walled canopy on-line, the kind you often see at a Farmer's Market or Craft Fair. I needed the one I chose to meet a few criteria:
Be cheap
Have four walls
Have two screen windows I could close
Be really cheap
Be tall enough and big enough to walk around in
Be easy to put up
Be easy to store for later project
Be super cheap cheap

I found my prize on Amazon, an above rated canopy with a nice wheeled storage bag for around 140 bucks. It came in white (which would make it easier to see what the heck I was doing), shipping was free, and it was the next to cheapest one on Amazon. Reviewers complaints that it couldn't deal well with heavy winds weren't a concern with me since I wouldn't be leaving it up but for a short time period. Other issues with the walls not perfectly lining up were solved with a 10 dollar roll of Duct Tape from Home Depot. I would use a oversized heavy duty tarp for my floor (about 20 bucks), a fan (15 bucks), and a cheap air filter from Kroger (12 bucks).
If you don't already own one you will also want some sort of ventilator while painting, a full body paint suit/cover all (usually disposable and under 15 bucks, but if you are careful with it you should be able to get multiple uses out of it), a face shield (20 bucks or so), and I used a LED light from my shop to hang in the canopy to make it easier to see (20 bucks). I would also recommend using some nice latex gloves just so you don't get paint everywhere. Some sort of paint thinner will help with clean up, and help thin the paint if you need to.

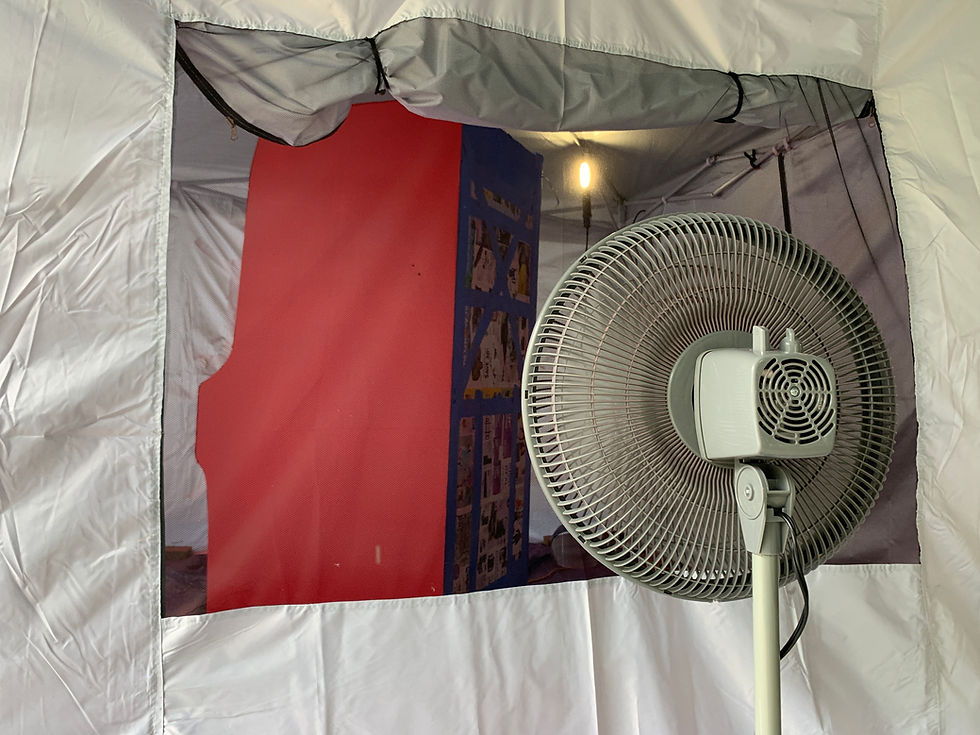
The canopy itself was easy to assemble, and fairly well made for the price. It is much easier to have two people erect the tent, but you can do it solo if you are crafty. The folding metal structure was defiantly not the sturdiest thing I have ever seen but it was fine for our purpose. One of the big highlights was the nice heavy duty bag everything fit into with nice large wheels on the bottom. The side walls simply velcro to the metal structure or skeleton of the canopy, and could have used a few more velcro tie down points for sure. The non windowed walls had a zipper opening in the middle for entry on either side. On the ground before I assembled the canopy, I placed a heavy duty tarp, using bricks to keep it down. Afterwards we built up the canopy right under my garage overhang. Any gaps I was concerned abut were covered with heavy duty duct tape or clamps. One window would be closed (via very cheap zipper closures) while painting, and opened with my cheap fan on (outside, blowing into the screen window) when drying the cabinet. The other window was always open but the air flow restricted via duct taping my air filter into the window frame. Any gaps in the window with the air filter I masked closed using some plastic film and cardboard (and even more duct tape) I had lying around in the workshop.
In the paint gun I purchased, I carefully read all the instructions twice and used the handy practice painting sheets they provided (painting only with water in the paint gun). The cabinet was as prepped to paint as I could possibly get it, after several rounds of Bondo and sanding. I masked the parts I didn't want to be red with painters tape, cardboard, and clear protective plastic.

The first round of painting I was careful to stick to the recommendations of the manufacture of the paint gun sprayer. The instructions stated it was not necessary to dilute oil based paint, and recommended a moderate setting for the spray gun. I got into my painting equipment, made sure my paint booth was hole free and went to town. I was careful to stay about 6-10 inches from the surface as recommended, and used controlled side to side painting much like I had done in the past (with success) with cheap spray paint. After the first painting go around, I wasn't super happy with the results. The finish was heavily textured and inconsistent despite mixing the paint well. After the cabinet dried (usually 2-3 days for oil paint just to be sure) I sanded the cabinet rough spots down and gave it another go.
On progressive rounds I was much more successful on the lack of pebbling and was much more satisfied with my results. This was because of a few changes in my method... firstly, I mixed the oil paint with a 3-1 paint/mineral sprits mixture as recommended on a few painting websites. Second, I stood at least 12-18 inches back from the cabinet from this point on. And finally I actually increased the spray power a bit (to setting 6 out of 10) which granted me more control. Each round was followed by wet sanding (with progressively finer sandpaper) and overall I ended up doing this dance 6 times, with an ending result of a very nice smooth paint job covering up 98% of the damage and repair work.

In the future, or if you are planning on going down this route yourself I would recommend these are things you really should take heed of...
Give yourself a break if you are getting light headed, even with a ventilator the paint fumes in a 20x20 inclosed space are pretty powerful
Mask, mask, mask what you don't want painted... I used heavy duty blue painters tape and thick plastic (with some cardboard) and it worked really well. I had virtually no paint leakage
Set up your paint booth somewhere were you are comfortable leaving it unattended overnight so you don't risk paint that isn't quite set yet from getting messed up
Clean out your paint gun as soon as you can after each use, it is a crap job but take care of your tools so they will take care of you
Always pay for top quality paint
My canopy kit although cheap worked great, I don't think for the purposes of a paint booth you could ask for a better canopy
I used bricks to weight down the posts of the canopy, but they do make canopy specific weights that would have been nice to have

Overall I was extremely satisfied with my cheap and reusable paint booth. It provided a nice working space, I had zero paint leakage outside the booth, it protected the drying paint very well, and it folds up and stores away easily. I even used the booth (helped by the red paint splatter) as a booth for Halloween to give out candy socially distanced style. Once the spring arrives I plan on using the booth to re-stencil both my Moon Patrol and aa Stargate cabinet, and it seems like I should have no issues using this booth for years to come as long as I am not very aggressive with it.
-Cassie


